Recipe first. You can scroll down for the wistful memories. Though a point on the name. When I lived in Rome, the buns that looked like this were in a bin labeled ‘Bigne”. I’d never heard of the type you get in New Orleans. Since then, after a fair amount of research, it seems that everyone else knows them as ‘Rosette’ or ‘Michette’ depending on what Italian city you are from. My memory, my terms 😉
This can be considered a work in progress. the recipes that I’ve found so far conflict in their ratios, this one is based on the recipe I found here, (though the actual recipe is recorded on his Facebook page.) As with a lot of good bread recipes, this is a 2 day affair.
Day 1:
Wether this is referred to as a Biga, a Mother, a Poolish or whatever, you’re making a flour and yeast mixture that is intended to ferment overnight. Given the recent popularity of high-hydration bread types, this particular recipe is relatively quite dry. I think this warrants some experimentation in the future as the result is not quite what I was going for.
- 800 g bread flour (roughly 4 cups)
- 350 g warm water (roughly 1 1/2 cups)
- 1 tsp yeast
mix together well and leave somewhere room temperature until tomorrow. I found putting it in a gallon sized storage bag worked well. leave the bag vented and periodically press out the gas so it doesn’t take over the world.
Day 2:
It helps to have a kitchen-aid or similar for this bit.
- 80 g bread flour (roughly 1/3-1/2 cup)
- 108 g cold water (about 1/2 cup)
- 1 tbsp diastatic malt powder
- 1 tbsp salt
Mix together everything but the salt, then start dissolving the biga into this mixture. Works best if you do it a little at a time until it reaches a kneadable state when you can just knead it all into one mass. Then add the salt and knead for several minutes. I think delaying the salt in this case may not be worth it. Again, the flavor when I was done was not as ‘bright’ as I would have expected. Given the important work the salt has to do on the chemical structure of the starches, this might be adding it a bit late.
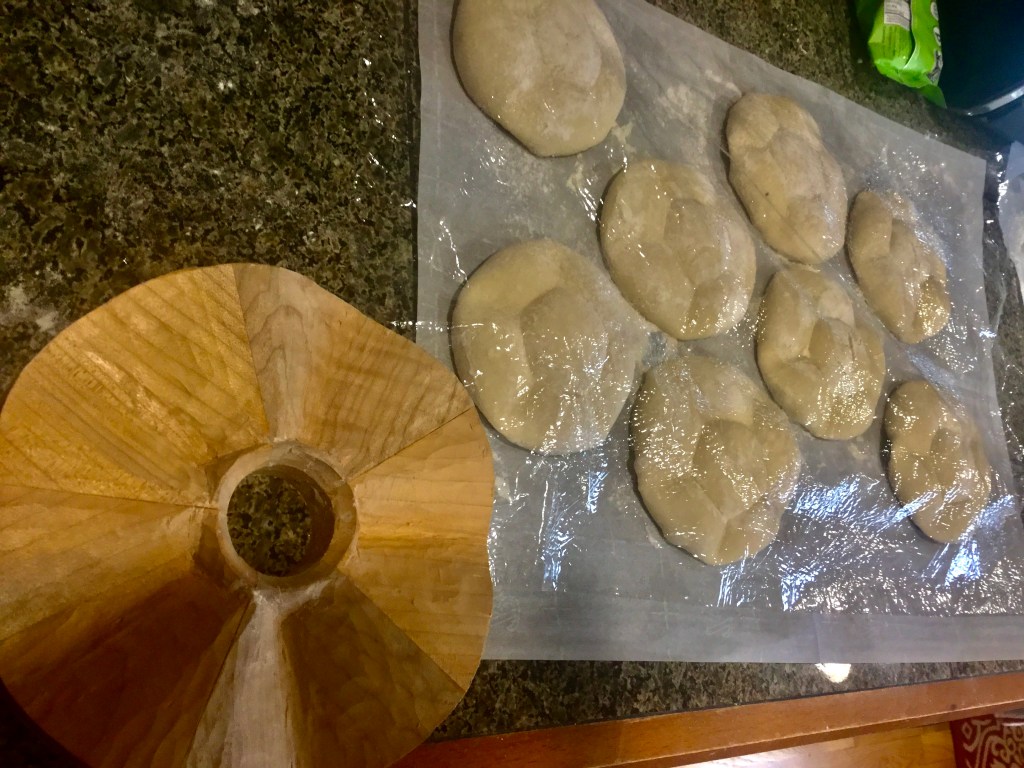
Once everything is kneaded and smooth, divide the dough into small balls, you should be able to get about 16 buns out of this, each about 80g. Let them relax on a floured surface under some plastic wrap or similar. After about 15 minutes or so, they’ll get formed and stamped and set aside to raise. The trick to stamping here is to cause enough of an incision that you get the characteristic cuts. But unlike breads that are slashed after the fact, these are stamped *before* the final raising. in order to work correctly the stamp is applied and then you pick up the stamped bun and squeeze it slightly to condense the cuts a bit and then it is left face down to rise for a while. the idea is to make the cuts re-adhere slightly during rising so that the cuts will come apart dramatically during baking.
Baking is done at the highest temperature your home oven will allow. Mine (and the usual in the US) goes to 550º. Preheat the oven and put a pot of water on the bottom of the oven. Don’t start baking until the water is steadily boiling. A misting spray bottle to inject extra water as you put the buns in the oven is also good. About 12 minutes should do it.

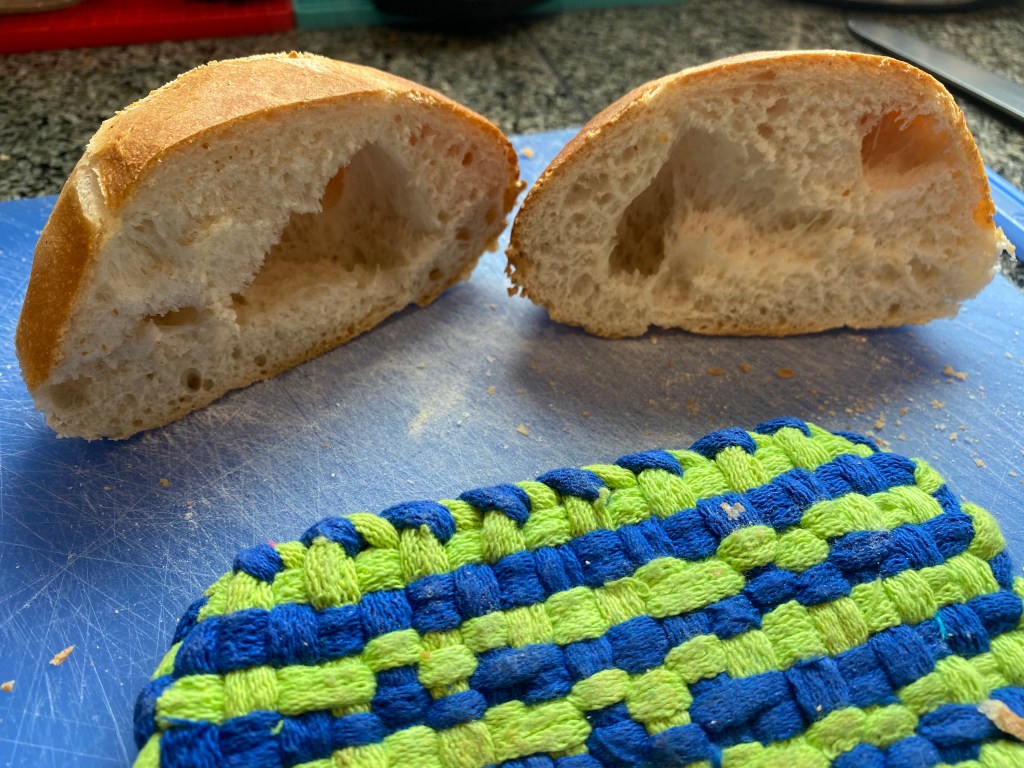
There is some discussion about what makes the big hole in the middle of these buns. Traditionally they are dramatically hollow, the entire center being made up of a single giant air bubble. in my recollection, the surface consistency of that bubble has the characteristic of that sort of shiny translucent nature of really good rustic breads. this recipe (as written) does not do that. The diastatic malt powder is supposed to weaken the gluten structure enough to have things fall apart in the middle, and it certainly seems to do that. But some variations of this recipe that I’ve run across suggest simply using sugar as an alternative.
The stamping is what took me this long to try this again. The stamp is supposed to cut a ring around the middle, but the blades that radiate out are quite blunt by comparison. The origin of this bun is related to the history of the Kaiser roll, (but the Italians weren’t going to eat bread named after a German king…) so a Kaiser stamp is sort of the idea. But the Italian variety is hard to come by, so the stamp you see in the image above I made out of some scrap maple I had floating around in the shop. If requested, I’ll publish some instructions on that.
On general principle, the variants on this concept do seem to settle on a roughly 2:1 flour to water ratio (by weight.) Again, quite dry by certain standards.
Experiments continue.

